
Clinical Exercise: Simple Continuous (bowel perforation)
Scenario:
A 55 year old patient presents with a history of inflammatory bowel disease for a bowel resection to remove a region of the bowel.
Diagnosis/Considerations:
Inflammatory bowel disease (e.g. Crohn's disease) can lead to need for a partial resection of the bowel and consequentially anastomosis of the resulting ends. Inflammatory bowel disease also frequently leads to significant edema and thickening of the wall of the bowel.
Surgical gastrointestinal anastomosis (GIA) staplers have different depth sizes (typically ranging from 2.0mm to 4.8mm, depending on the manufacturer). In cases where there is significant intestinal wall thickening, the thickened bowel wall could make it difficult to utilize even the largest depth stapler. In this situation, a surgeon may choose to utilize suturing for bowel anastomosis rather than a GIA stapler.
Although staplers are faster and commonly considered to have higher fidelity (lower leak probability), when performed by experienced hands there are negligible differences in outcome between the use of suture or staple in bowel surgery.
Mechanism:
The goal is to bring the edges of the cut bowel tissues close together to promote healing and provide sufficient security across the opening to limit any leakage of intestinal contents.
There are many different styles and patterns of suturing, when you will learn during the surgical clerkship. We previously practiced the simple interrupted suture, which has high tensile strength and simplicity in placement.
The simple continuous suturing (sometimes called a running suture) is rapid to perform due to the limited number of knots that must be placed and typically results in a tighter junction that is less likely to leak compared to interrupted sutures. The first suture placed is similar to a simple interrupted suture whereby a surgeon's knot is used to close that first suture. Unlike interrupted sutures, rather than cutting the thread and placing a new suture the needle thread is left intact to use in a 'continuous' (or running) pattern pulling the edges of the incision into continuity.
Treatment (perform these steps on the donor in a mock-procedure):
PREPARATION: Send a member of your team to the instrument supply tables to fetch five suture packets (one per student, extras are available as needed, but please initially take only the supply numbers indicated to ensure sufficient supplies are available for all tables).
1) Open a suture packet, observe the tip of the needle is embedded in protective foam or a protective plastic clip.
CAUTION: exercise care when handling suture needles to prevent impaling yourself. While some surgeons will handle needles with gloved hands, by far the safest technique to prevent needle-stick injury is to use forceps/hemostats to handle the sutures.
2) The first suture is placed nearly identically to the simple interrupted suture that we practiced in a previous lab.
a) Grasp the base of the needle (where the thread is attached) firmly with a pair of hemostats holding it in one hand.
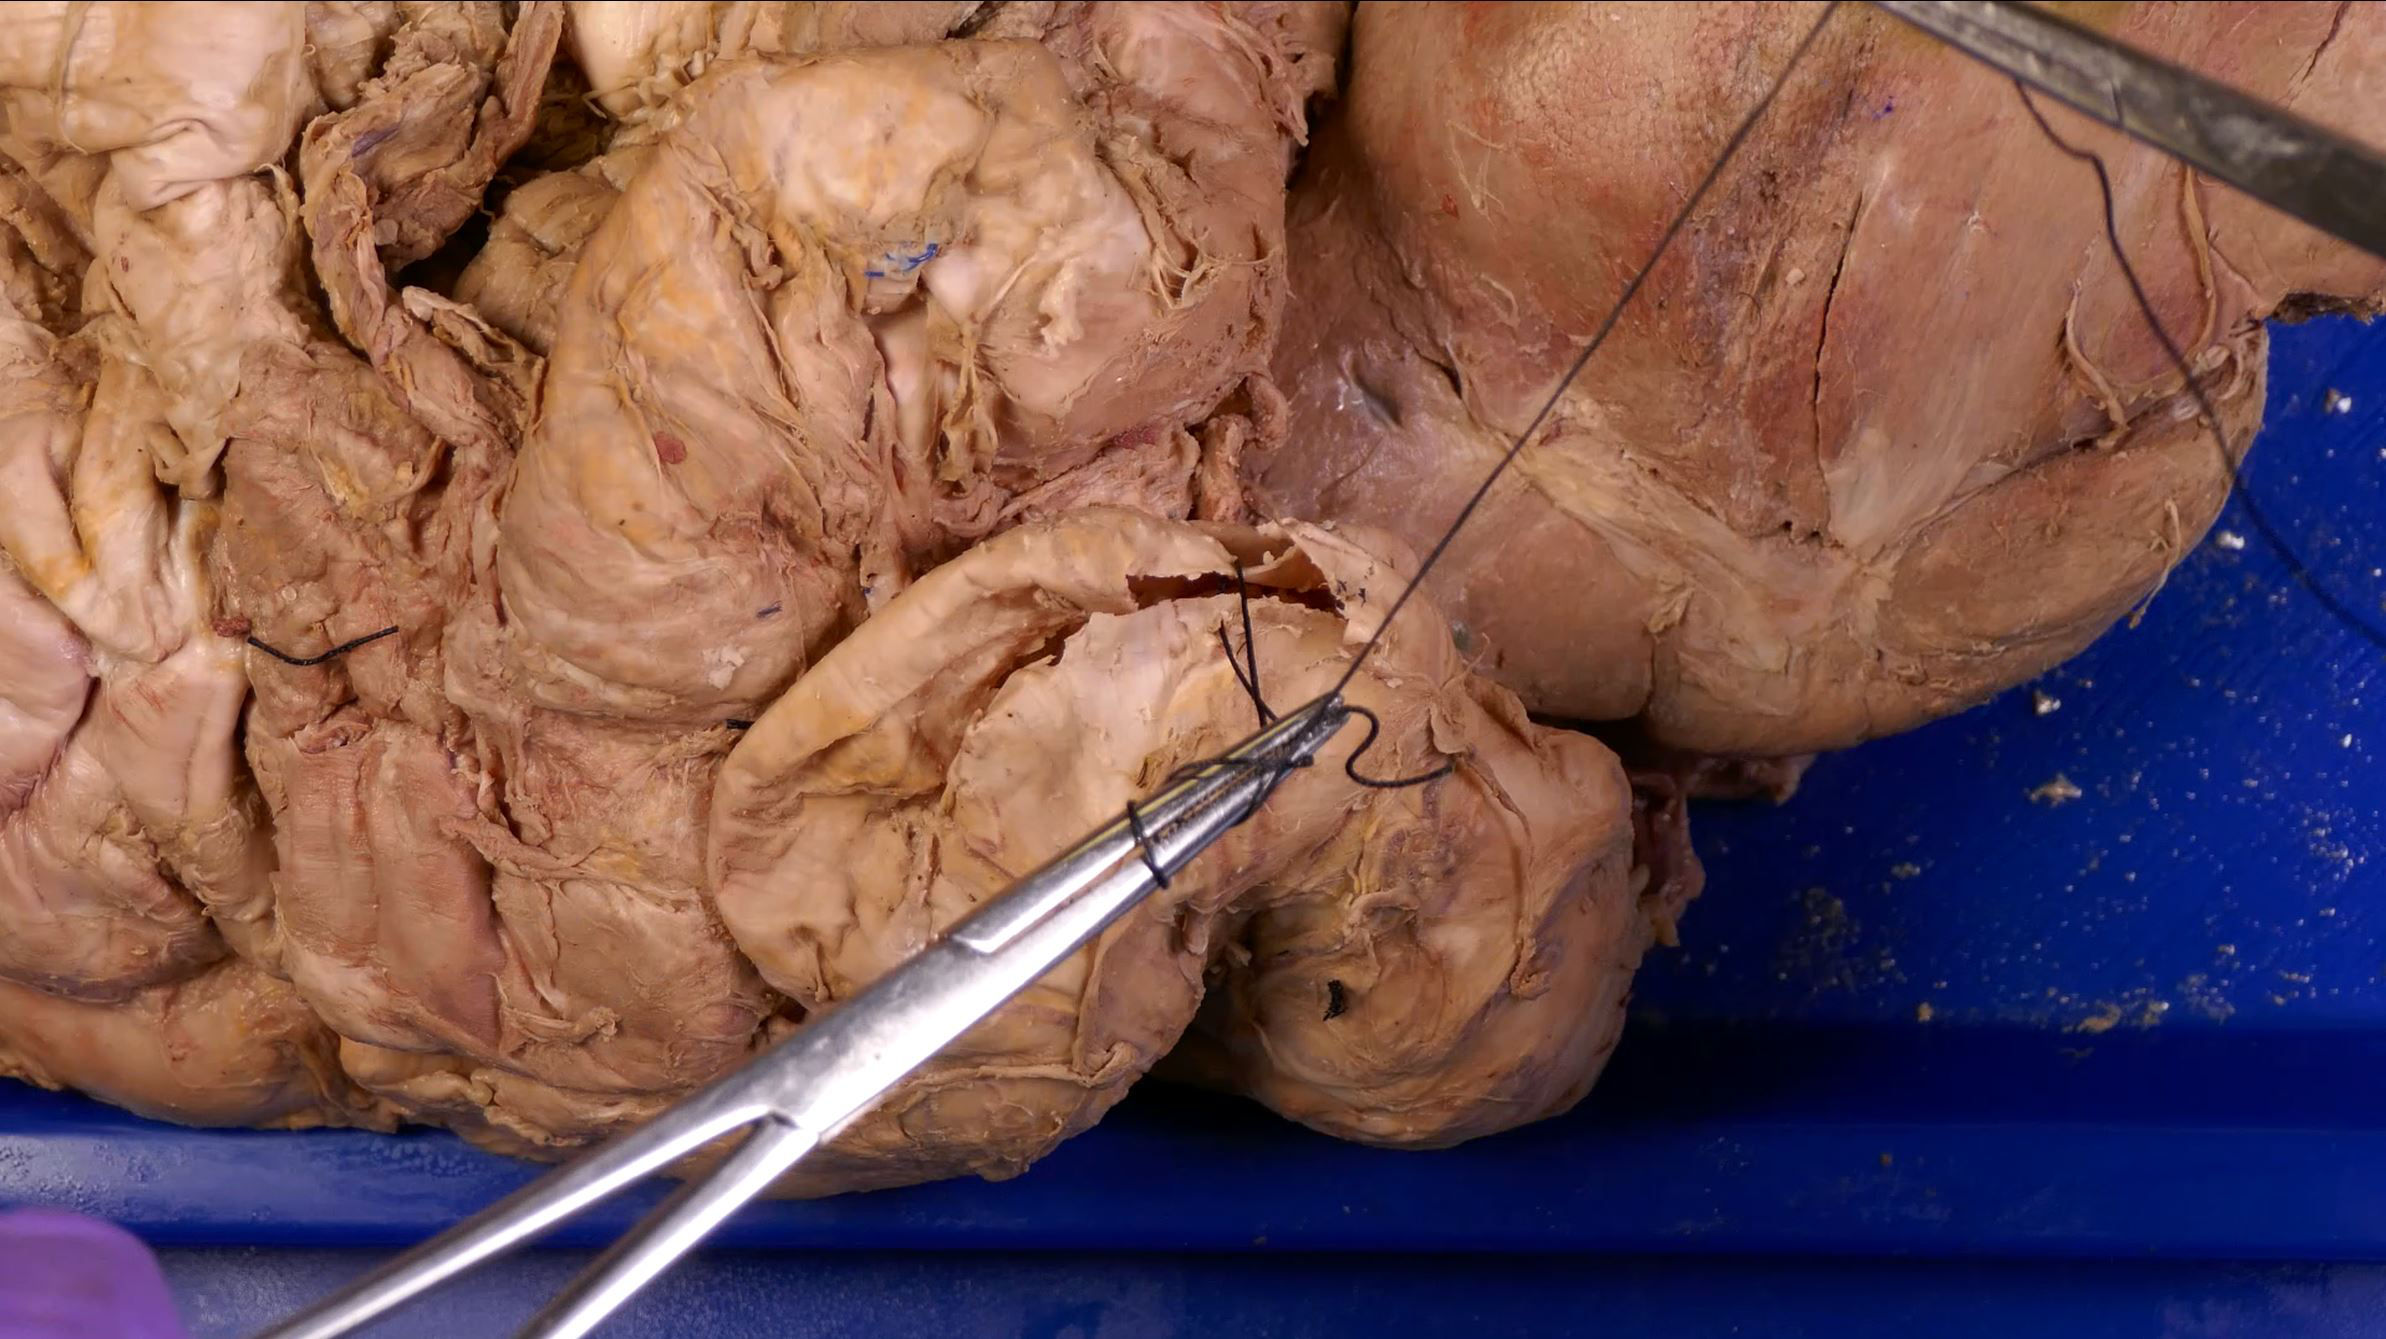
b) Grasp the wall of the intestines with forceps and insert the point of the needle into the intestinal wall on one side close to the start of the incision.
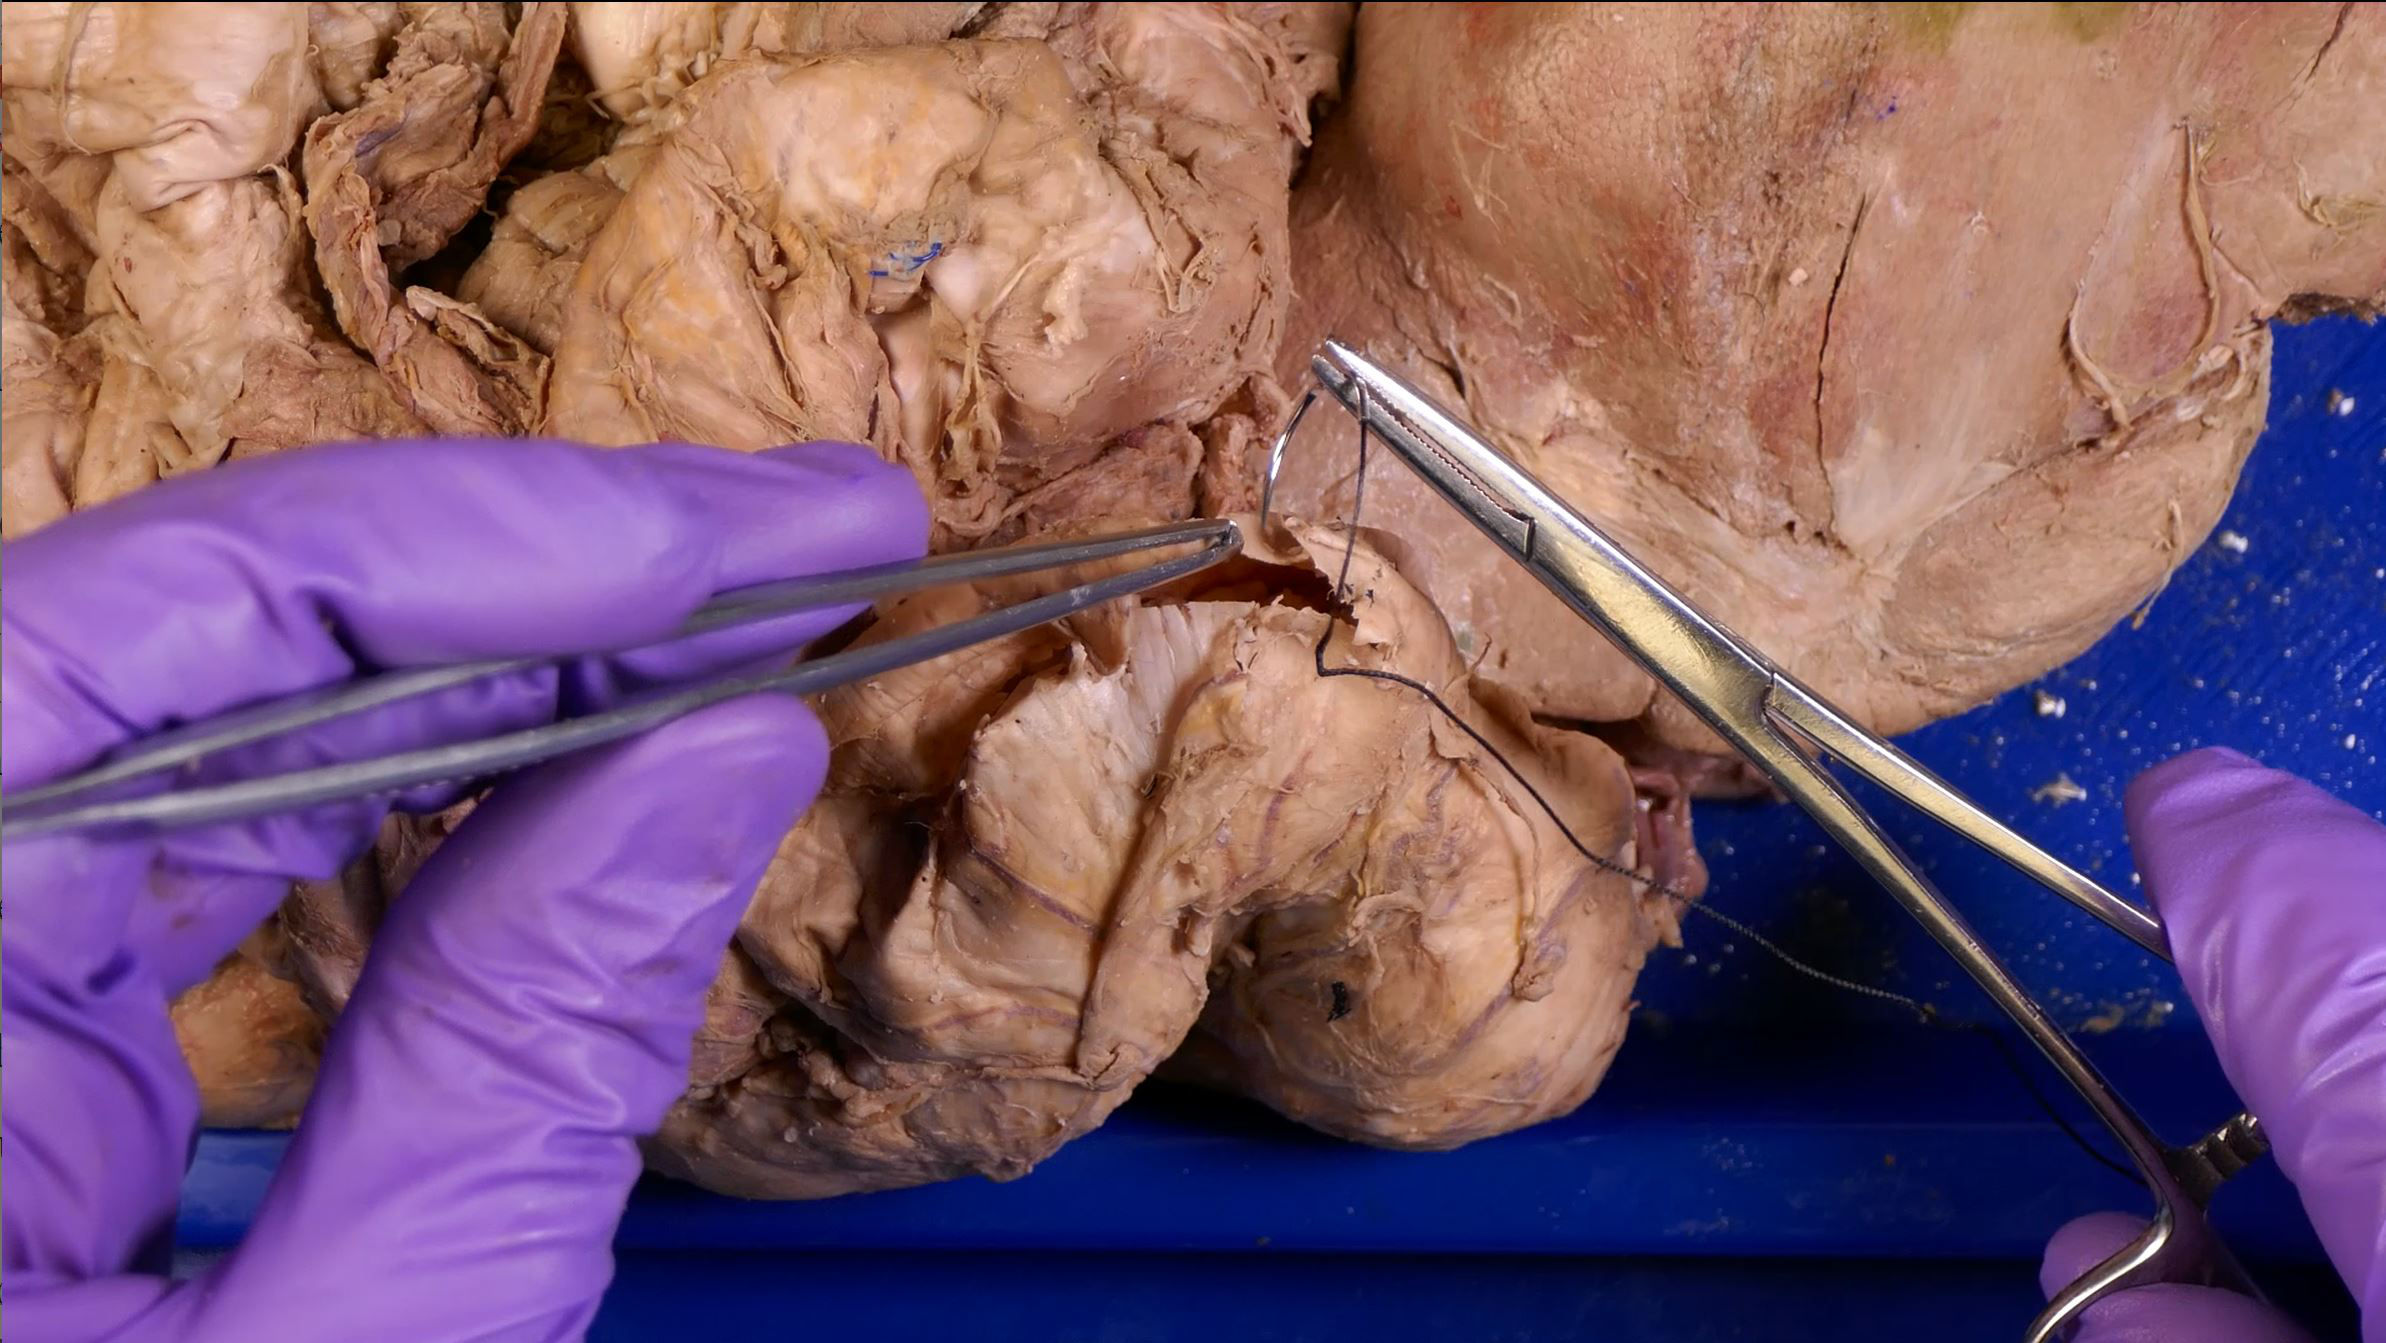
c) With a 'scooping' motion insert the needle through the intestine wall.
d) Grasp the intestine wall on the other side and continue the scooping motion such that the needle tip penetrates through the opposite wall.
e) Release the base of the needle and with the hemostats grasp near the tip to draw the body of the needle all the way through.
f) Continue drawing the suture thread through the opening until approximately 3-5cm of thread is left on the starting side.
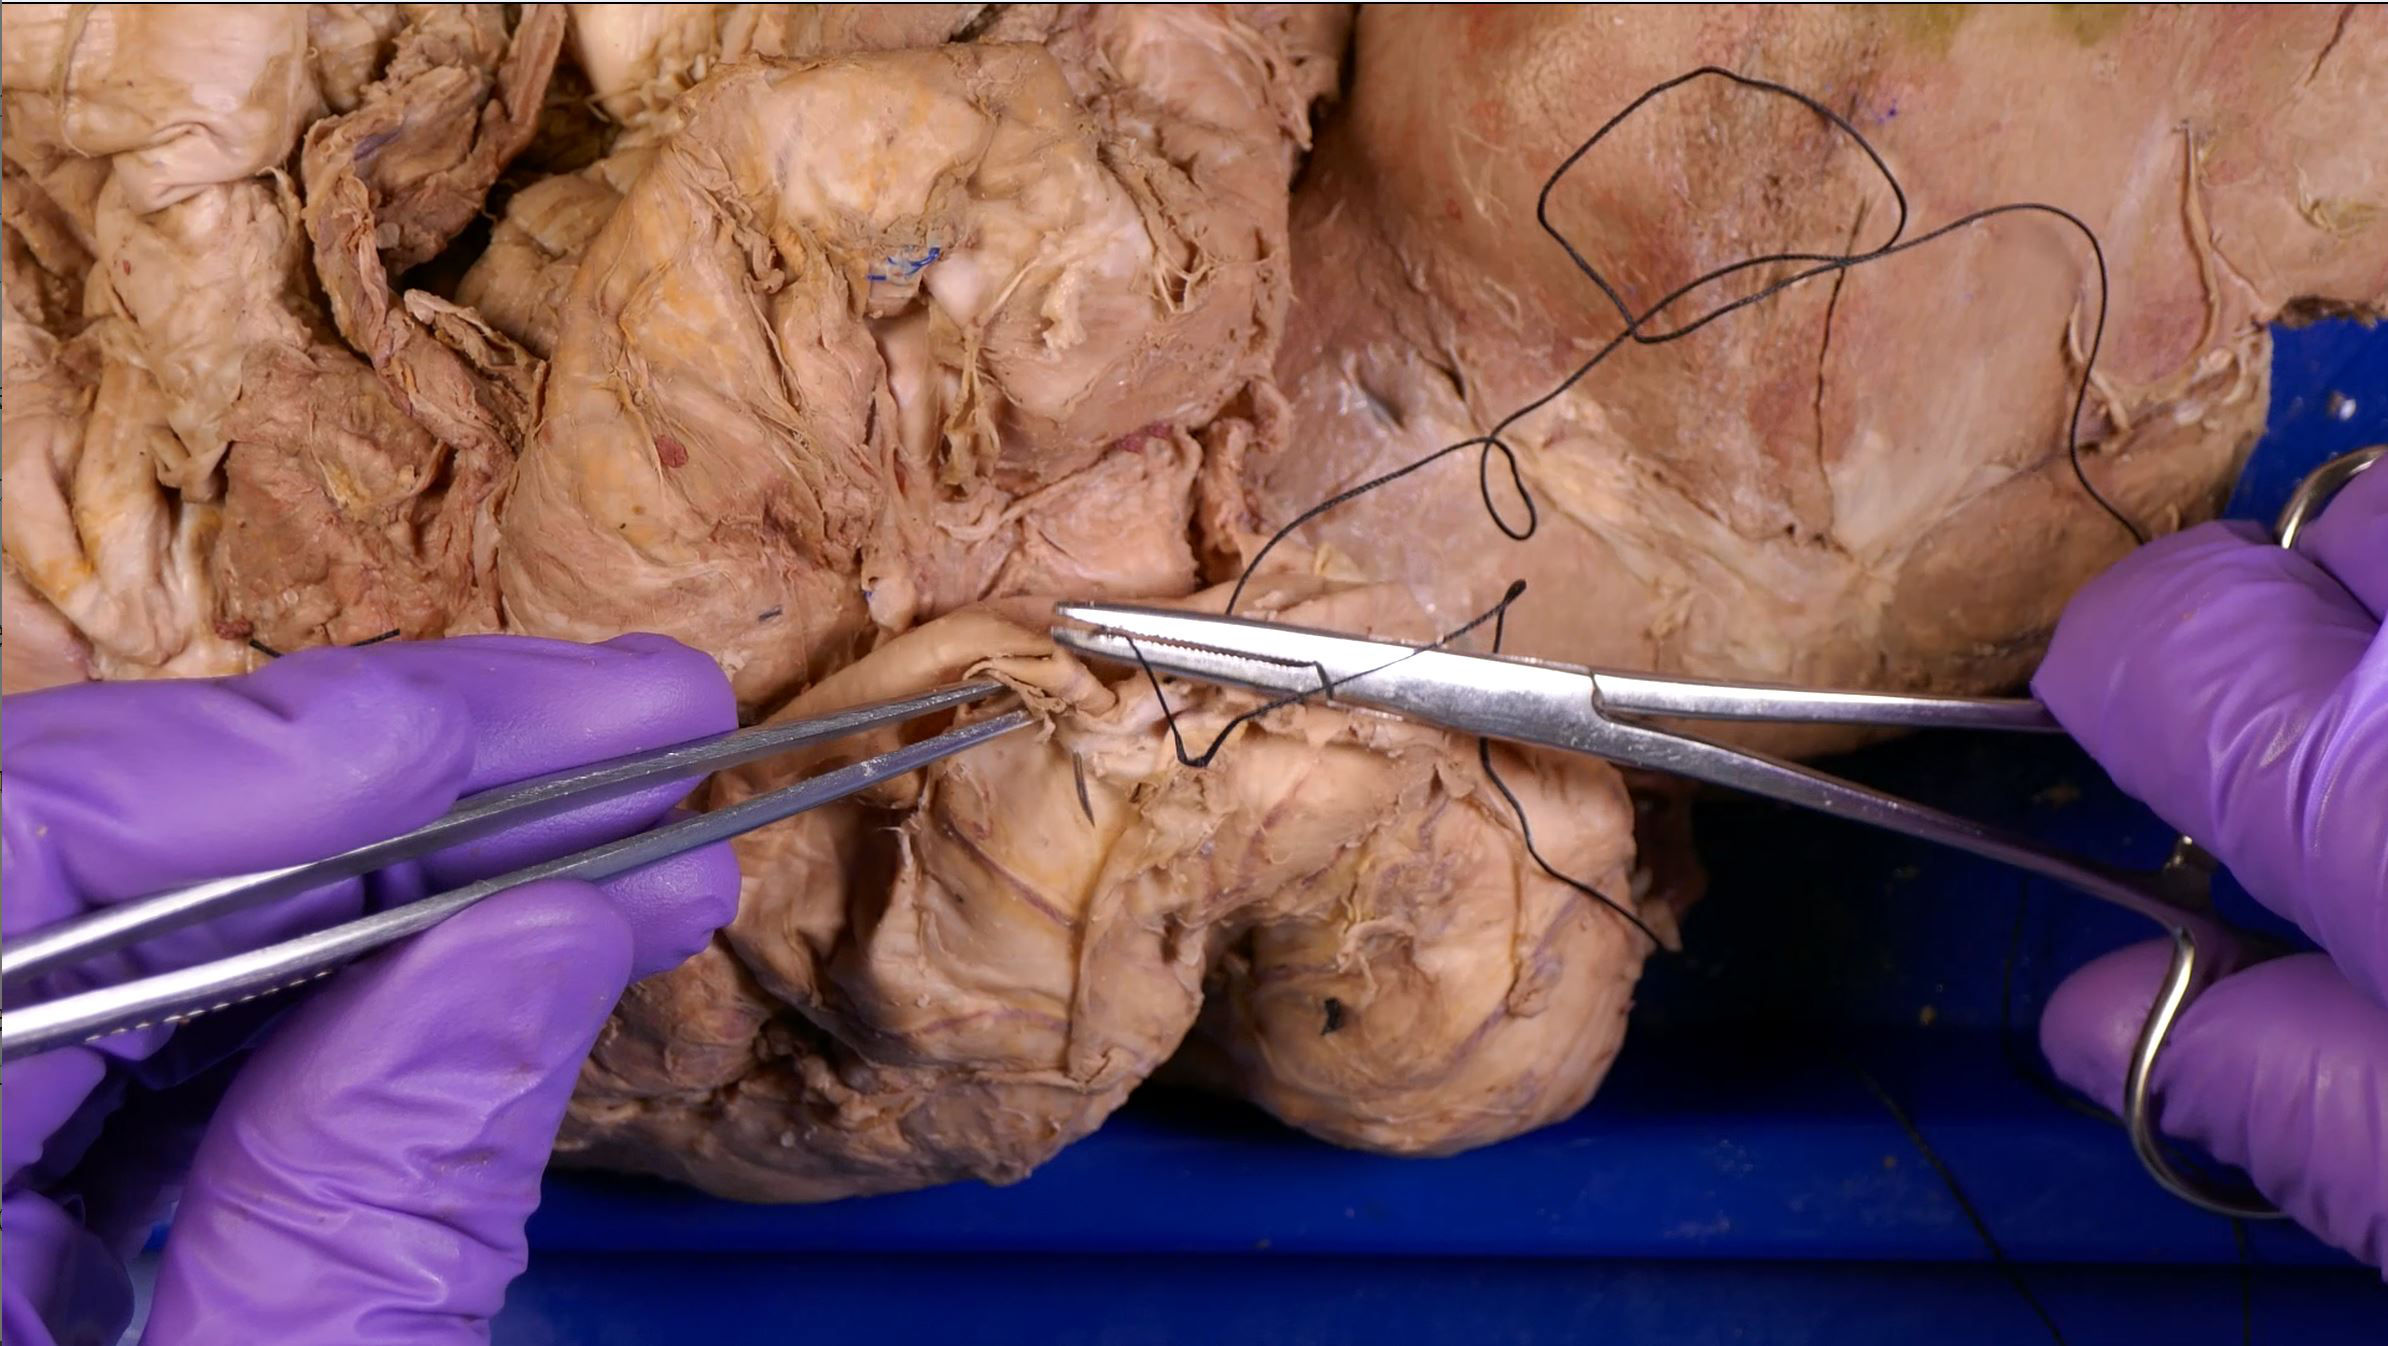
g) With a forces or a hemostat grasp the long end of the thread still attached to the needle.
h) Wrap this end of the thread twice around the end of a second pair of forceps/hemostat.
j) Slightly open that second pair of forceps/hemostat and grasp the free end of the thread (which is the other end from that grasped in the first forceps/hemostat).
k) Pull this free end of the thread through the loop that was made around the forceps, pulling till the thread forms a snug knot.
This is a basic overhand knot commonly referred to as a 'throw' in surgical specialties.
l) Move the second pair of forceps back to the midline of the cut and make an additional knot (throw) around the forceps using a single thread wrap, pulled tight in the opposite direction from the first throw.
This double wrap throw followed by a single wrap throw is often called the 'surgeon's knot' providing good strength. Additional throws can be added as required to strengthen the knot.
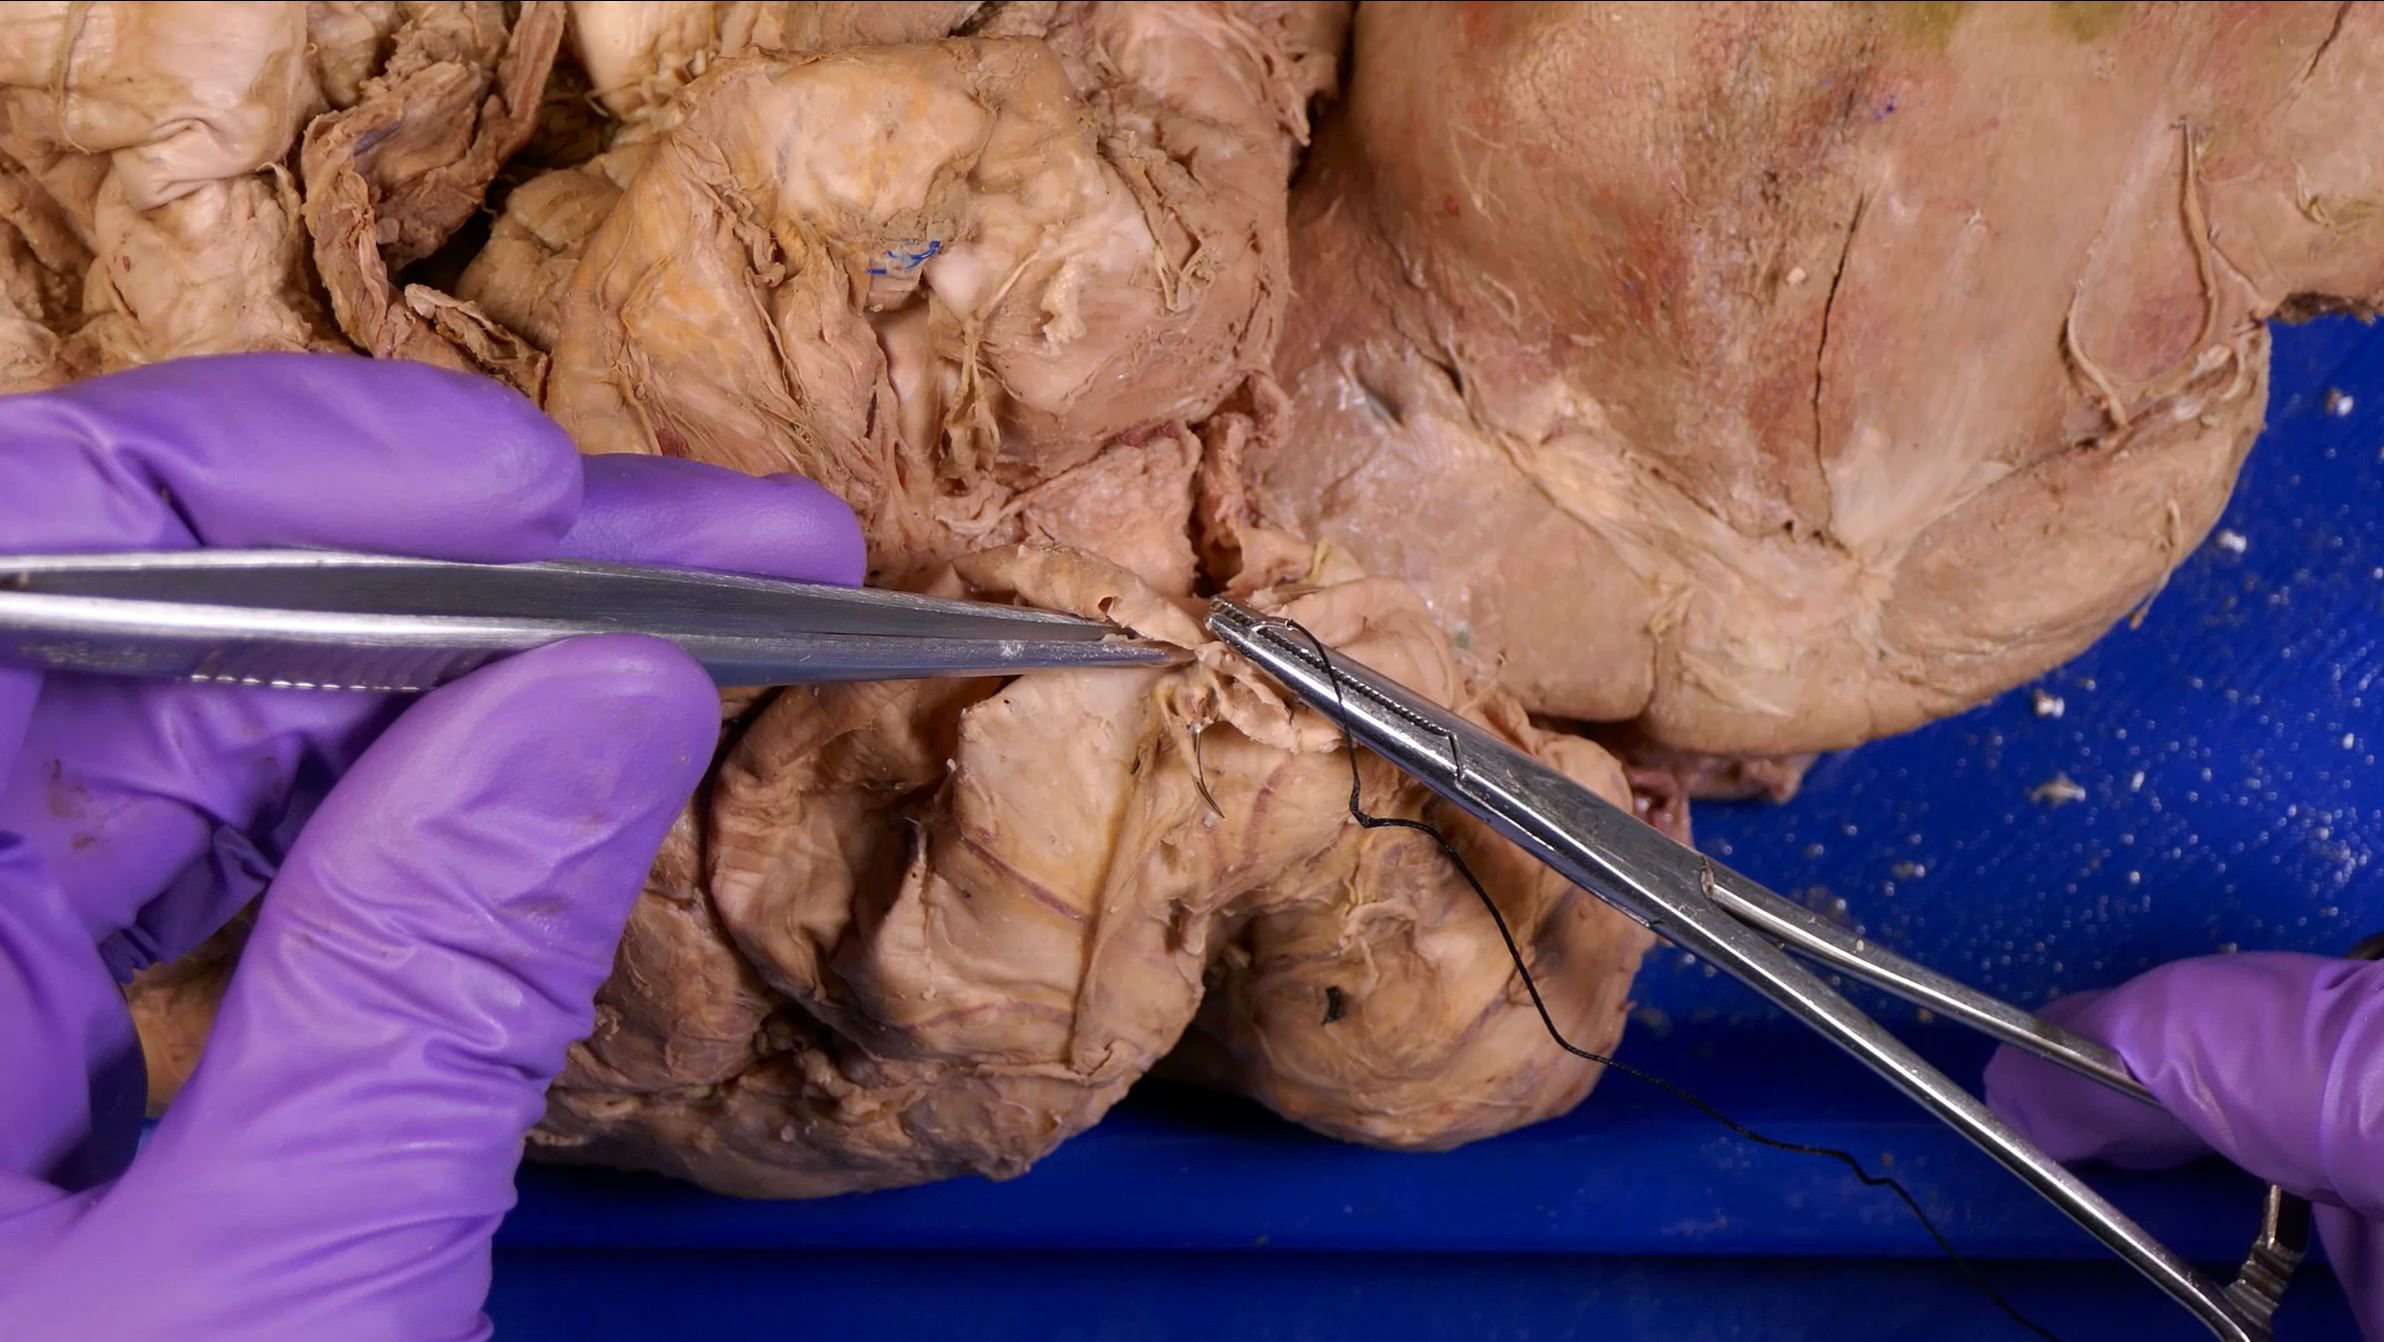
3) Cut off the short loose end of the thread, leaving a few millimeters near to the knot, and leave the thread connected to the needle intact.
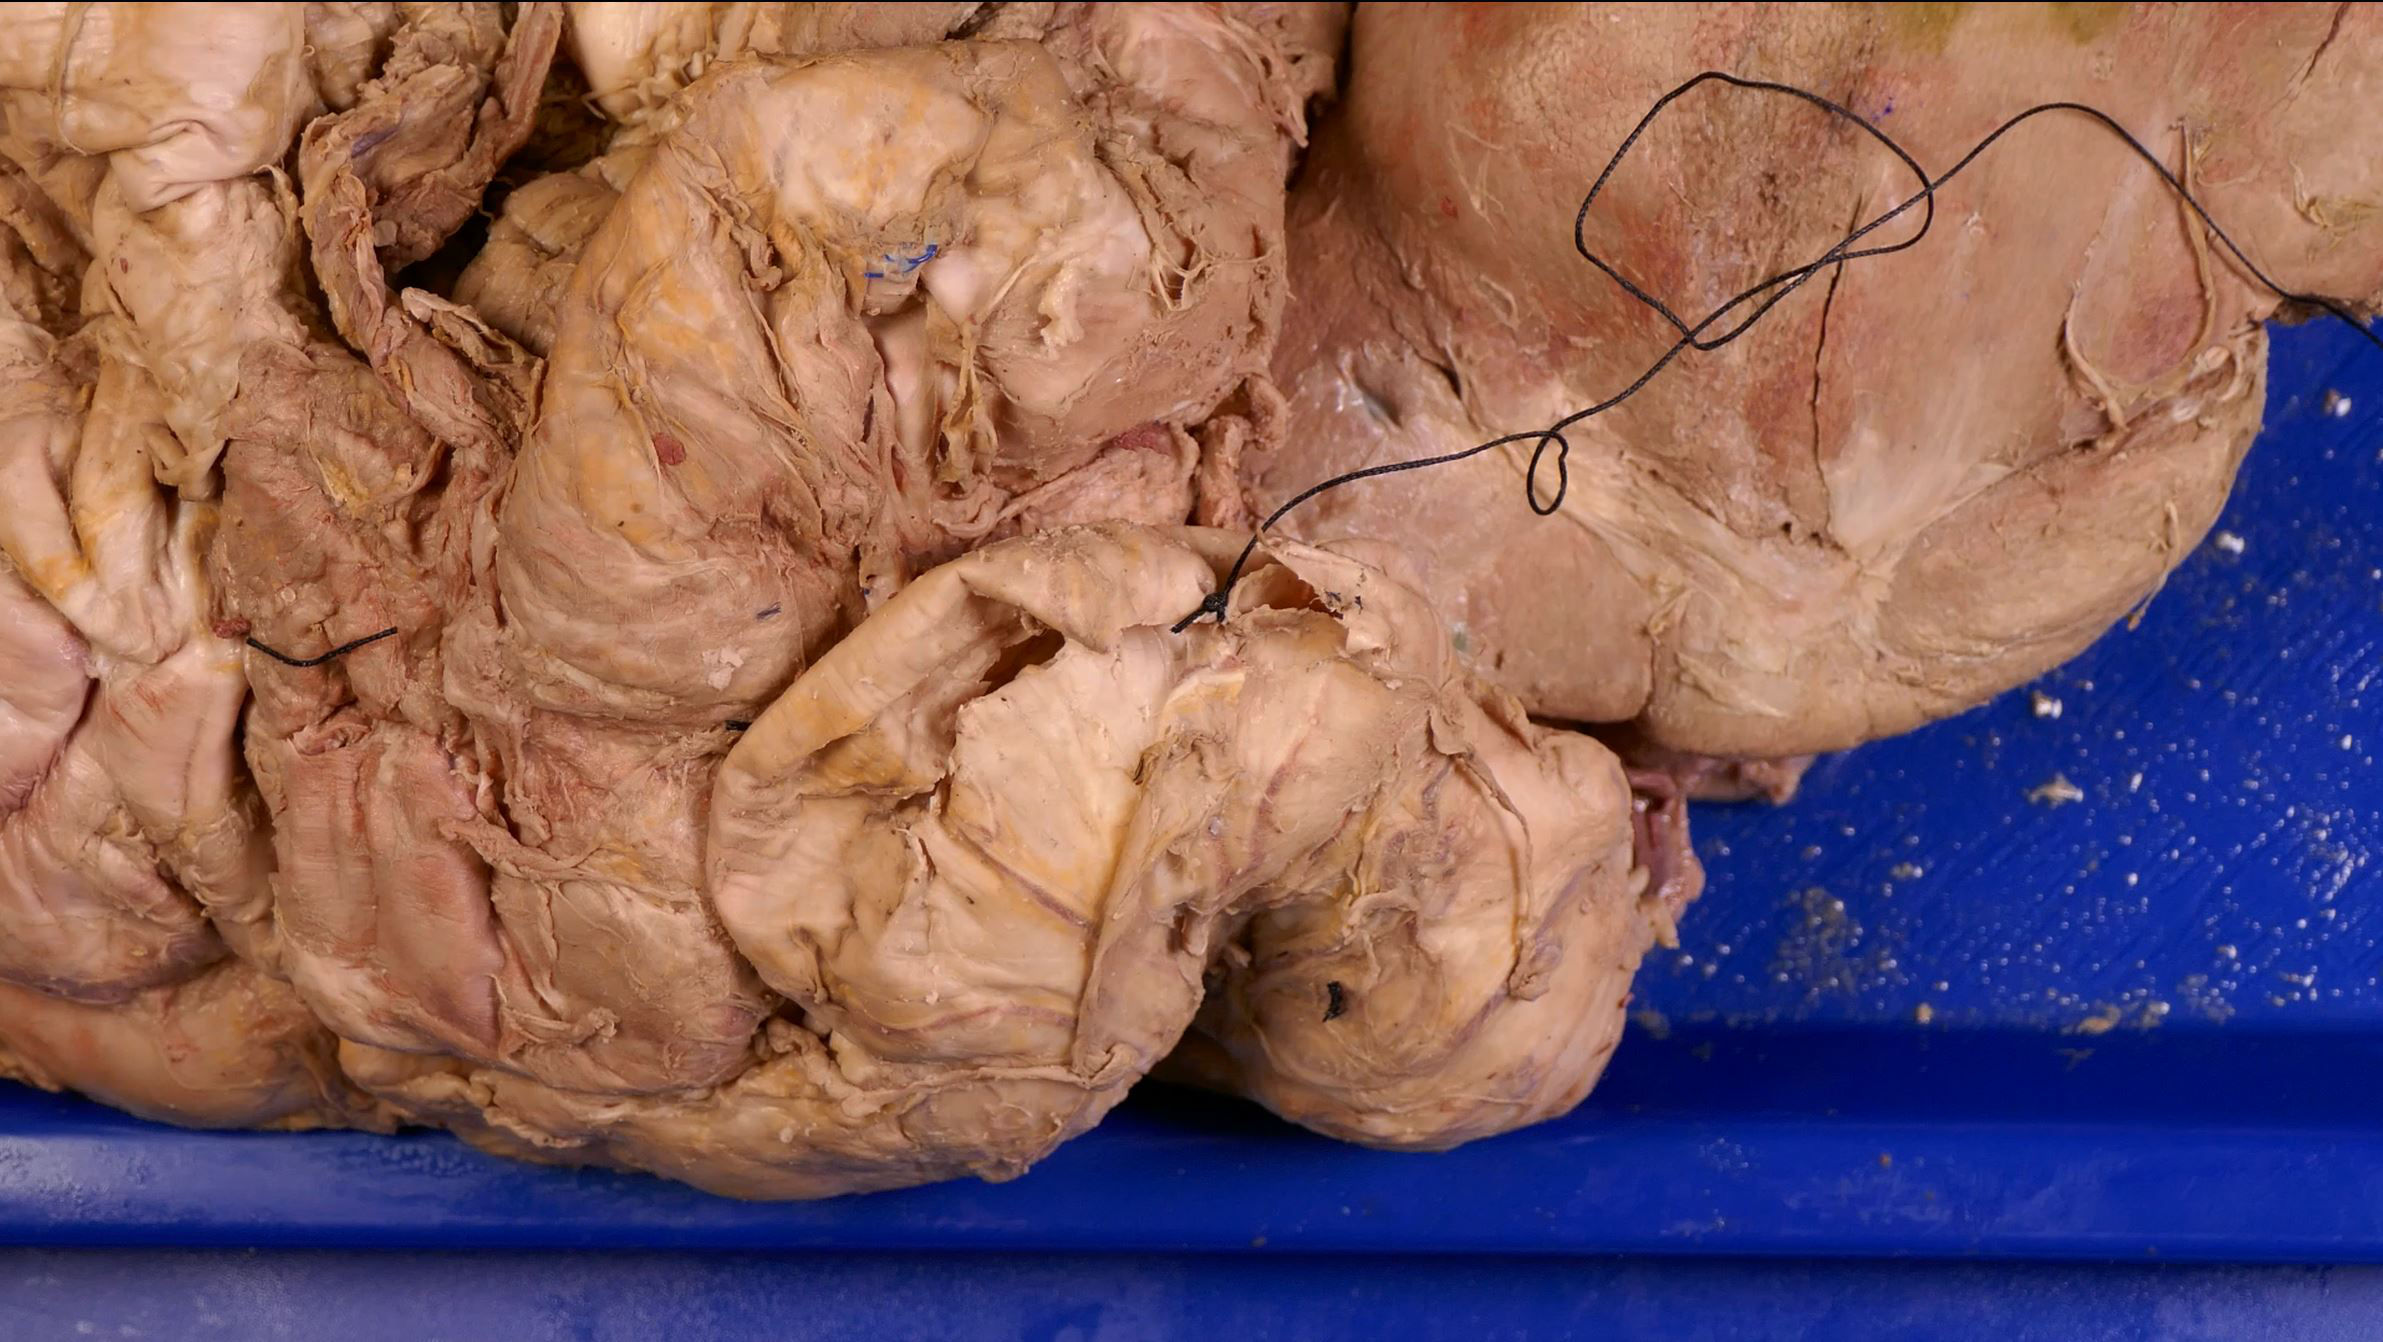
4) Place another suture 3-5mm from the first to begin a series of continuous sutures along the incision.
5) After placing the first of the continuous sutures, it helps to have an assistant maintain light tension of the thread to the incision while each suture is placed.
a) As the thread is pulled through, the assistant releases their hold to allow the loop of thread to be pulled snug into a suture.
b) The assistant grasps the thread to the new suture to maintain tension while the next suture is placed.
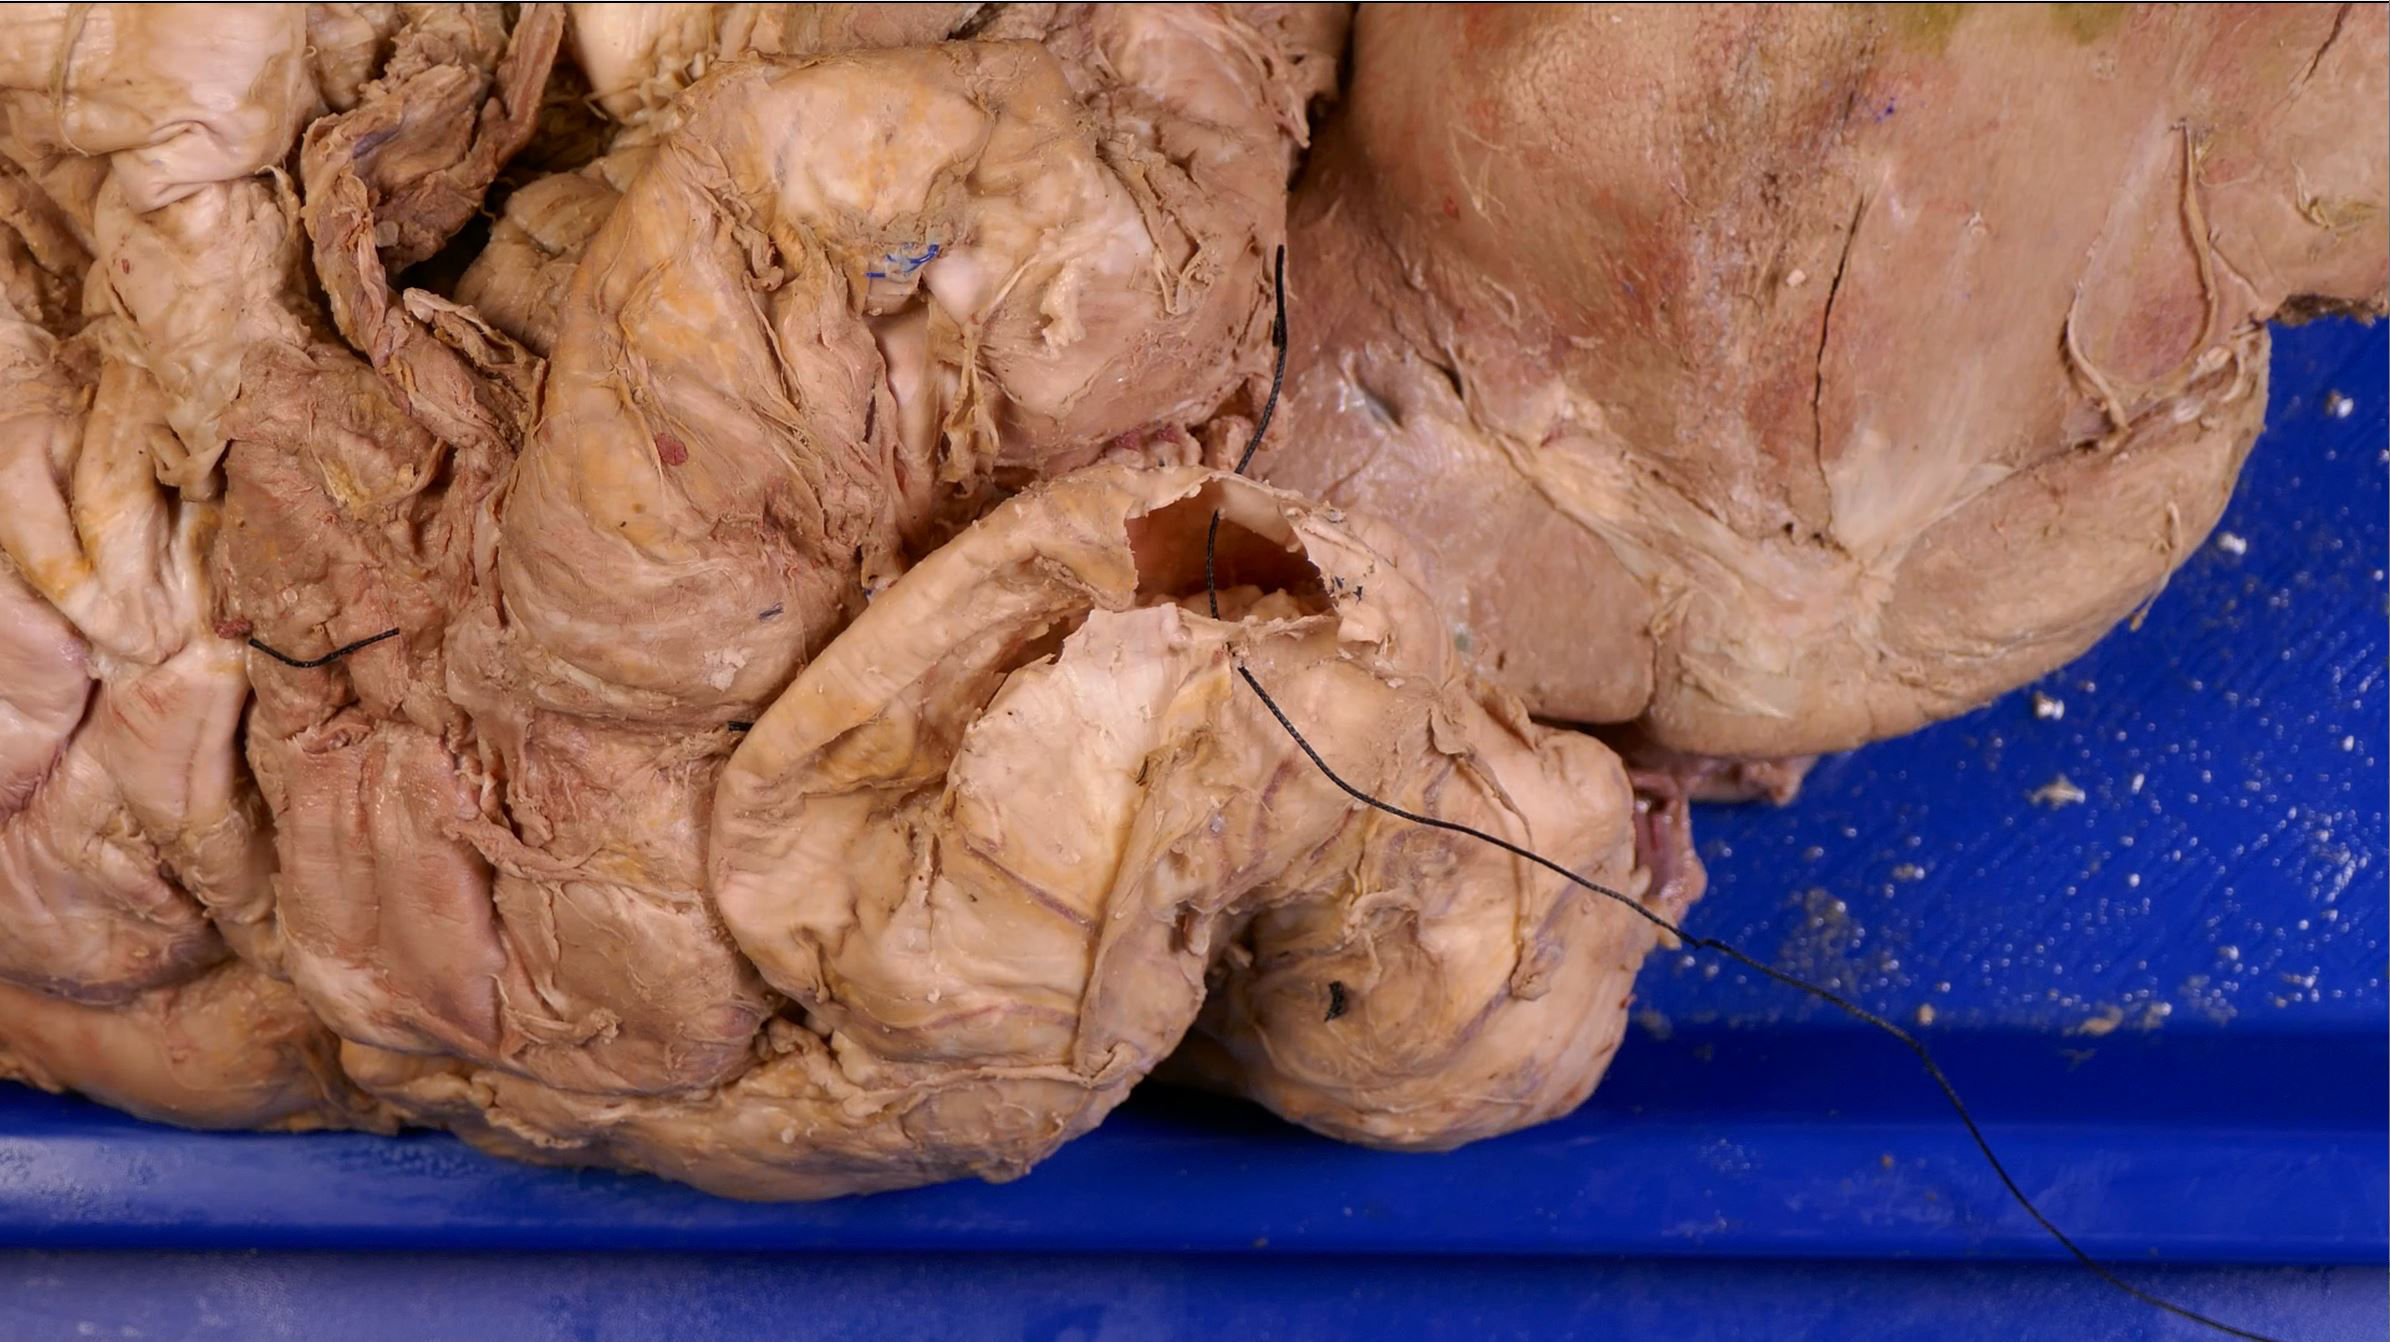
6) Continue this continuous suture until the incision is closed (or till you have placed enough for practice).
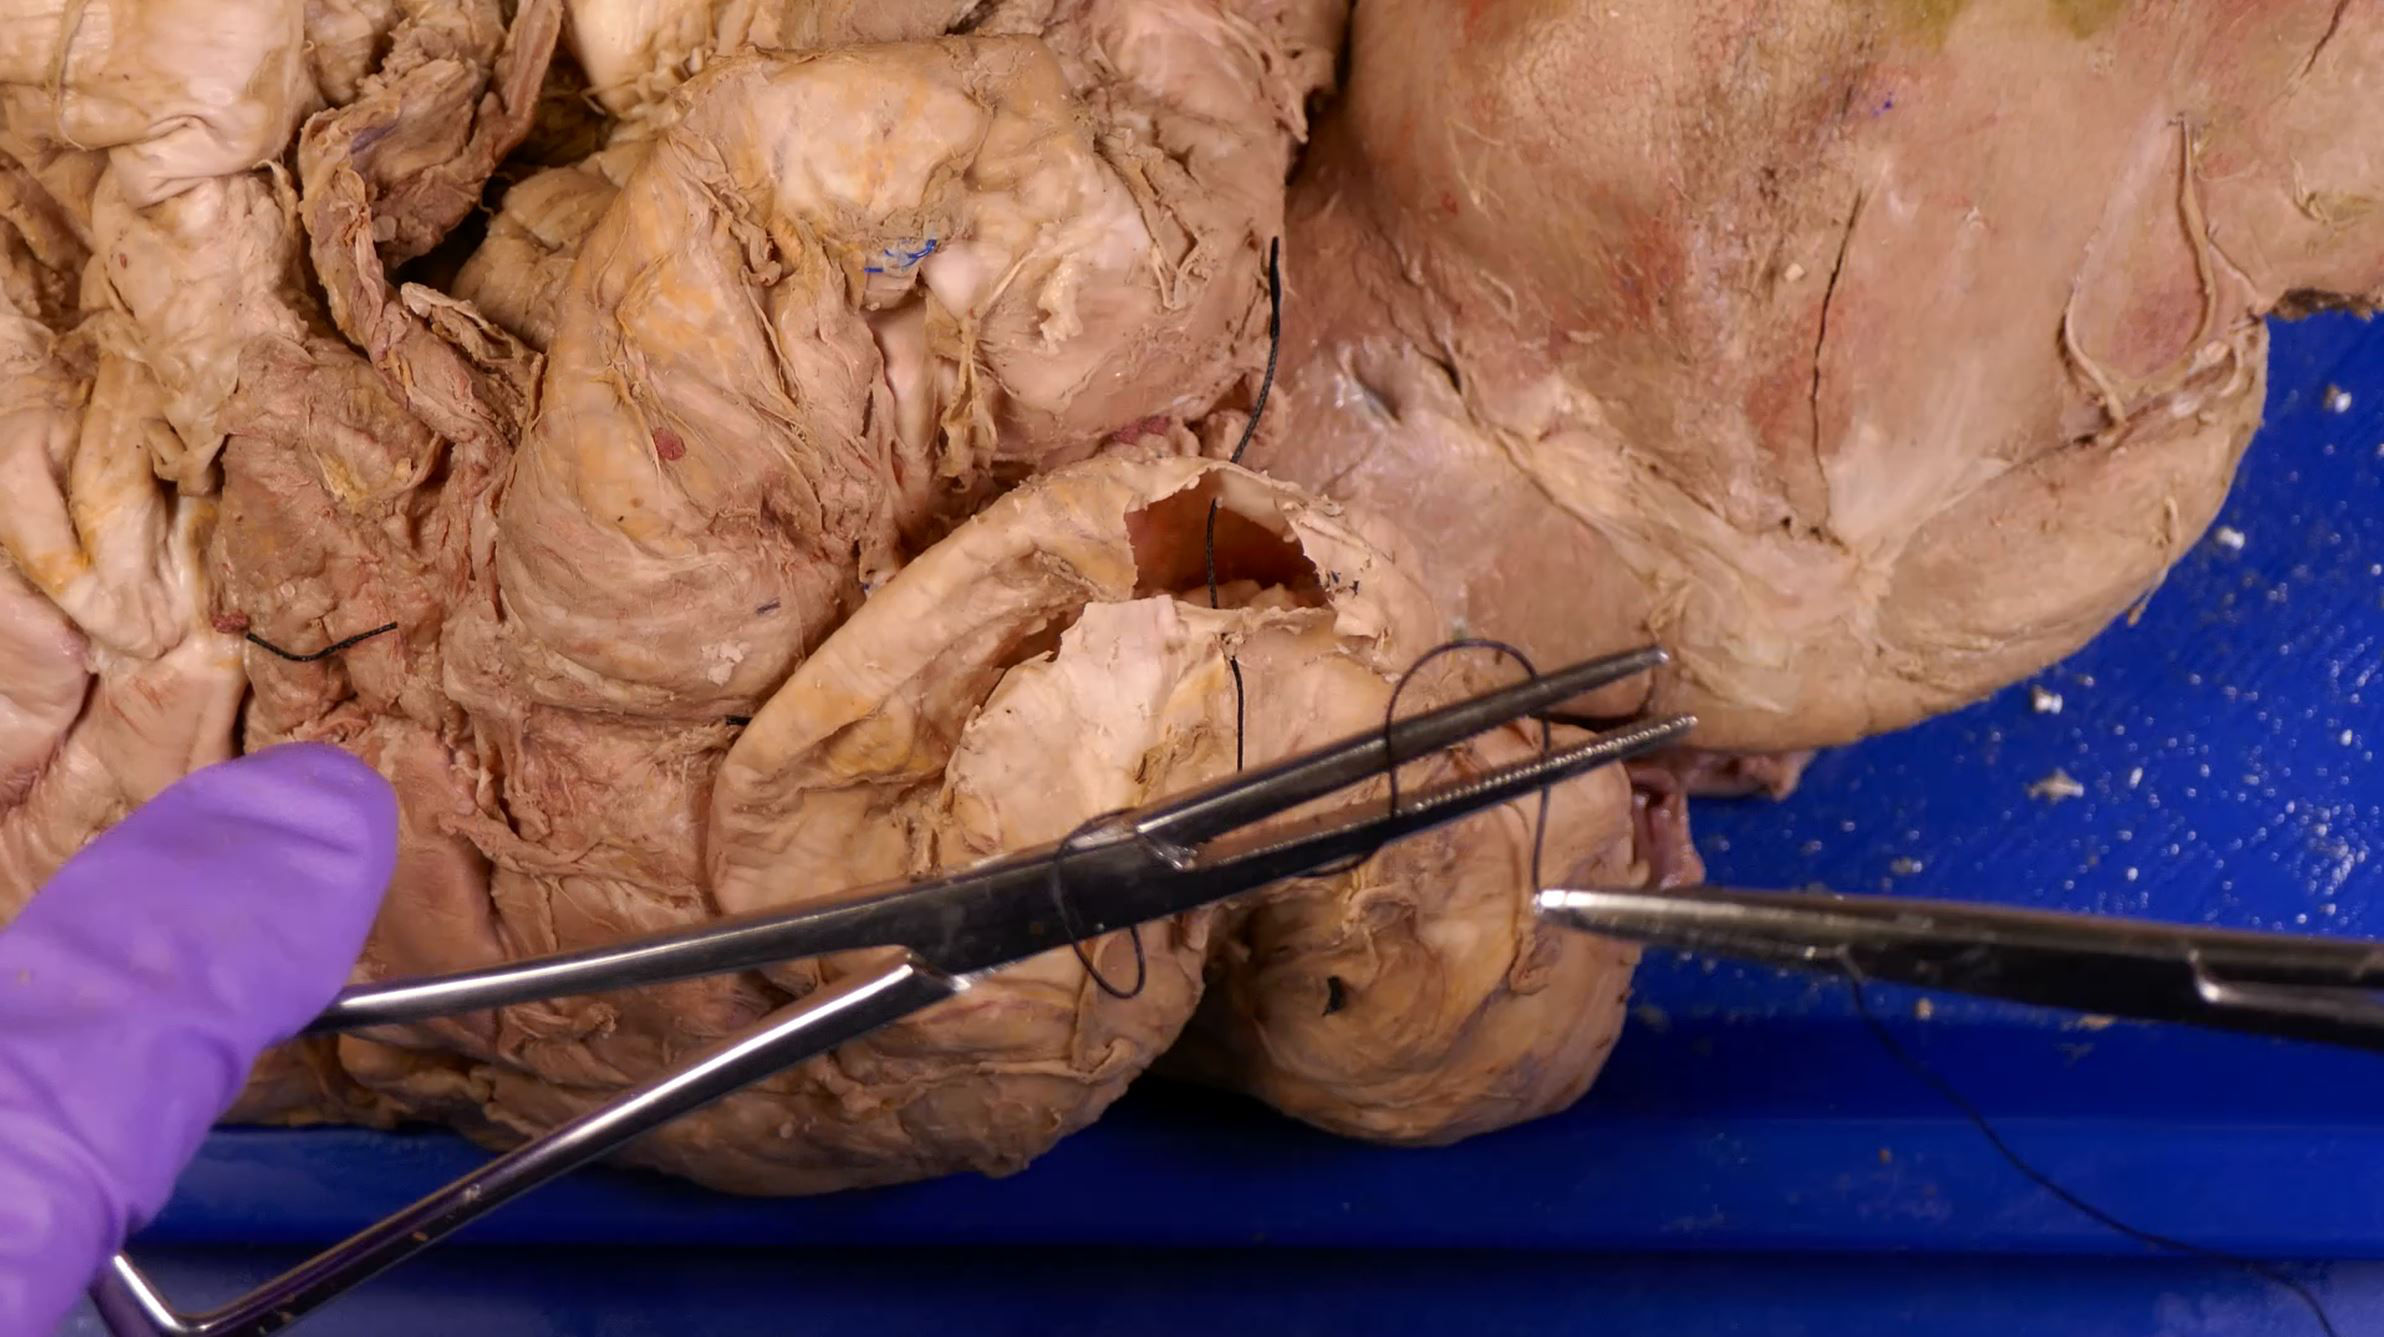
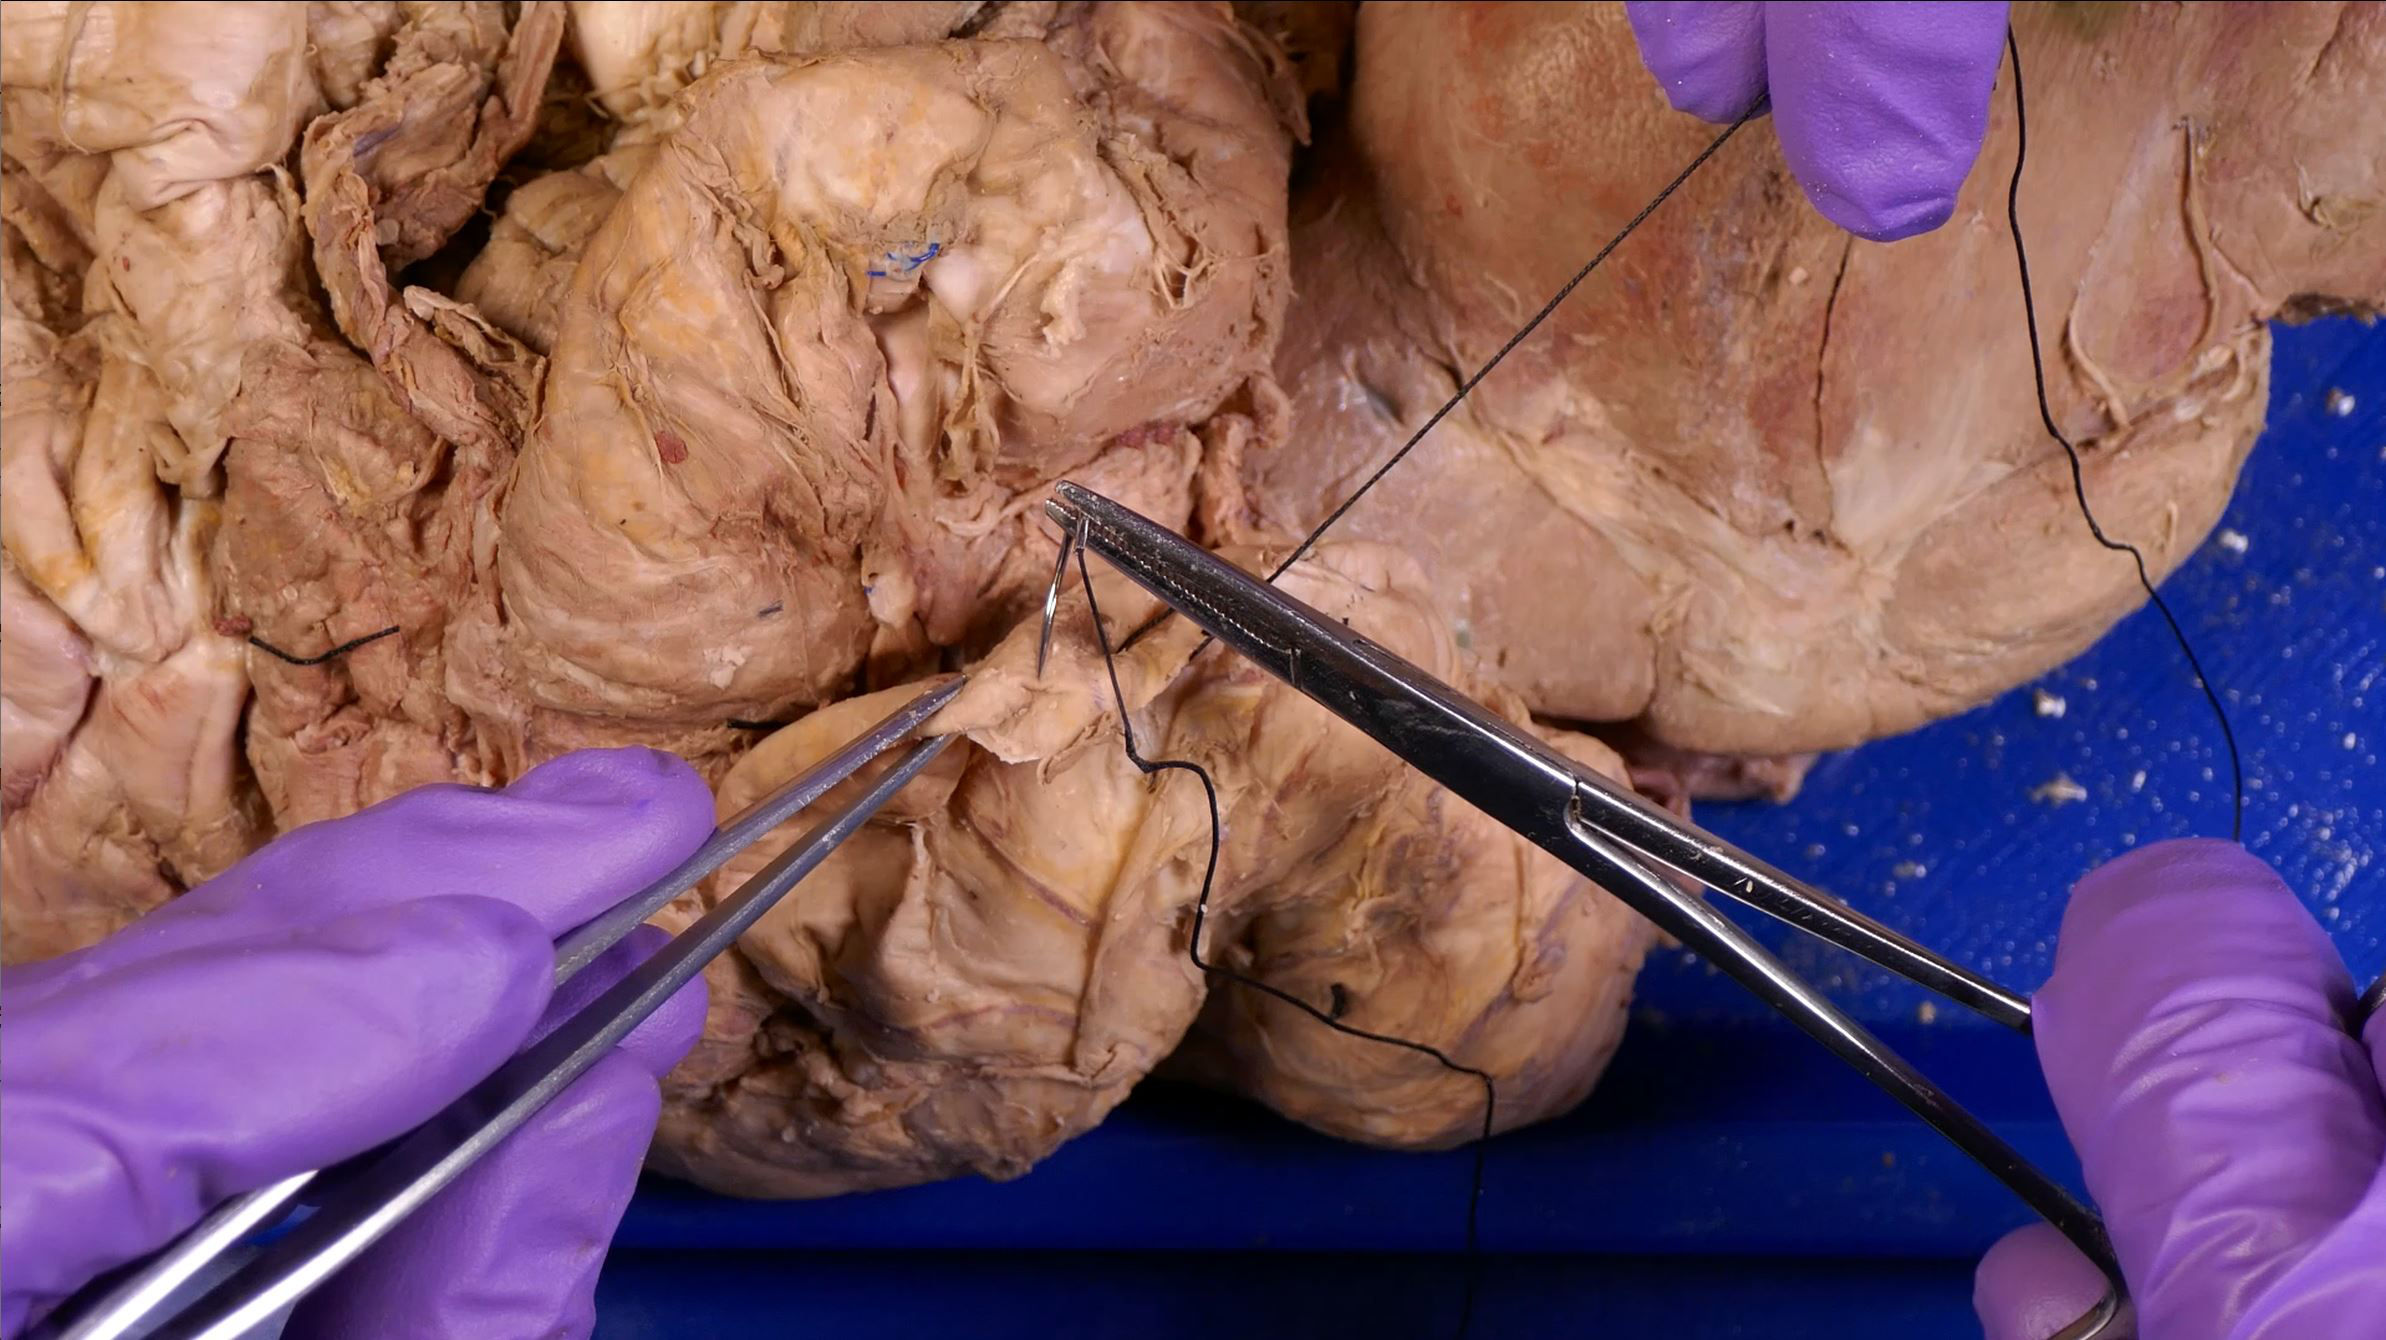
7) To close a continuous suture, when pulling through for the final suture do not pull the final loop of thread tight, as the exposed final loop will be used as the other side in a surgeons knot.
a) With a forces or a hemostat grasp the long end of the thread still attached to the needle.
b) Wrap this end of the thread twice around the end of a second pair of forceps/hemostat.
c) Slightly open that second pair of forceps/hemostat and grasp the free loop of thread (which is the other side from that grasped in the first forceps/hemostat).
d) Pull the free loop of thread through the loop that was made around the forceps, pulling till the thread forms a snug knot.
e) Make an additional knot (throw) around the forceps using a single thread wrap to form a surgeon's knot (additional throws may be placed as required to strengthen the termination knot).
8) Each member of your team should have the opportunity to place a run of sutures using a suture pack each, there should be enough thread on each needle for a run of sutures to be placed.
NOTE: When finished suturing ensure that all suture needles are collected into one of your Emerson trays and transported to the sharps containers for safe disposal. Make sure to account for each of the suture needles you used...leaving an instrument behind inside a patient after surgery is a mistake we strive to avoid!
Outcome:
The sutures are neatly performed and the patient recovers well. You anticipate full healing with minimal long term concerns.